In short
Brew strong sweet tea, let it cool to room temperature, add a SCOBY and a generous splash of starter liquid, cover the jar with a cloth, and wait 7 to 14 days. Taste from day 5. When it is as tart as you like, bottle it, keep some liquid back for the next batch, and chill.
For every liter of water: about 5 g of loose tea (2 tea bags), 60 to 70 g of sugar, and 100 to 200 ml of starter liquid. One SCOBY covers any batch size.
What you need
Kombucha needs very little equipment, and none of it is specialised (kombucha equipment goes through each item and the starter kits). A first batch of 2 liters is a good size: enough to learn from, small enough to throw away without tears if something goes wrong. If you are still working out what kombucha actually is, what is kombucha is the place to start.
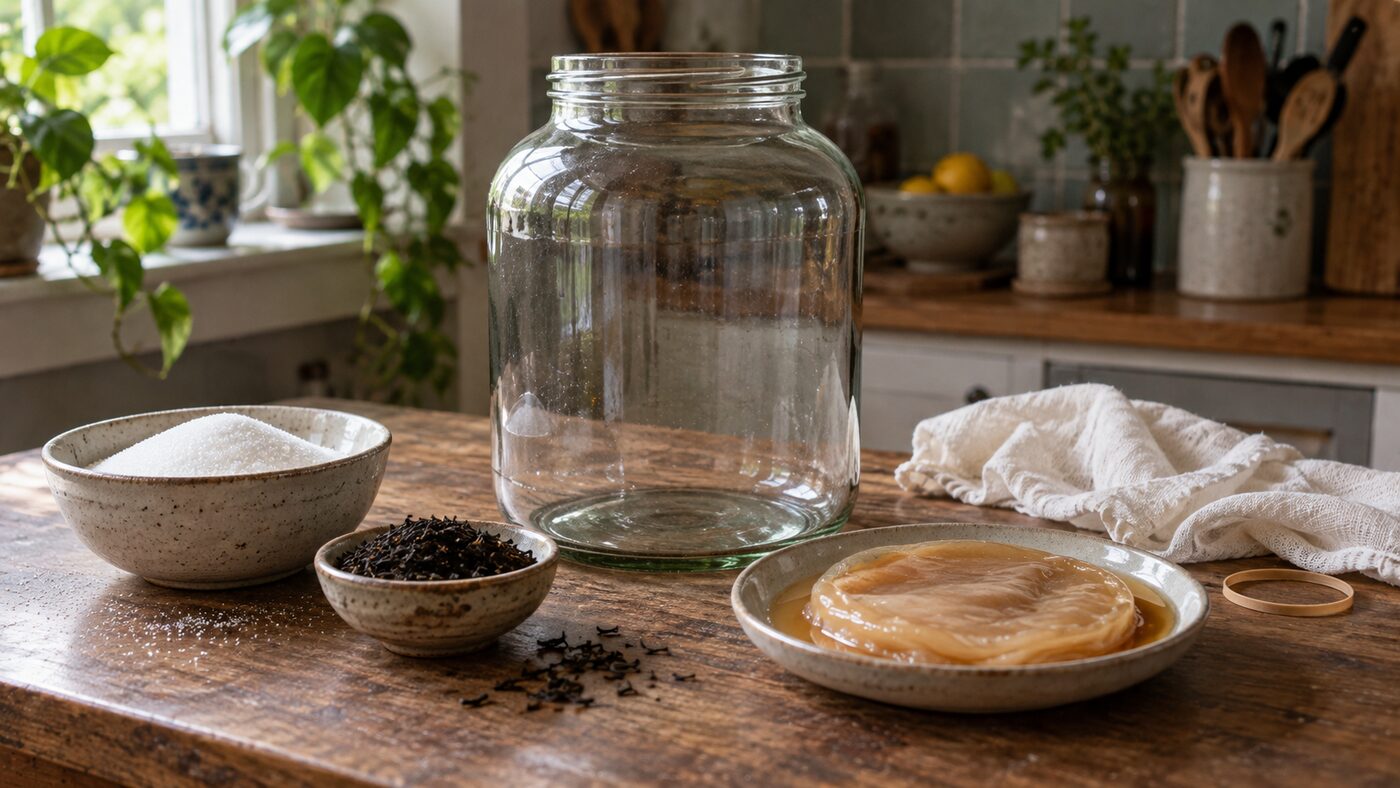
- A wide-mouth glass jar of 2 to 4 liters. Wide is better than tall, because the culture works at the surface.
- A tightly woven cloth cover (a clean tea towel, a coffee filter, or a few layers of cheesecloth) and a rubber band. The cloth lets air in and keeps fruit flies out.
- Plain black or green tea. Loose leaf or bags both work. Avoid teas with added oils or flavourings, such as Earl Grey, which can weaken the culture. The best tea for kombucha compares the options.
- Plain white sugar. It feeds the culture, but some sugar remains in finished kombucha; the amount varies by batch.
- A SCOBY plus at least a cup of starter liquid, either from a brewing friend, a shop, or grown yourself from a bottle of raw kombucha. The two are really one culture: the SCOBY is the rubbery disc, but the same living community is in the liquid too, so they always come together. If you are not sure what that is, read what a SCOBY is first.
- Later, bottles with tight lids for the second fermentation.
Glass is the safest vessel. Food-grade stainless steel also works. Skip ceramic unless you know its glaze is lead-free and food safe: kombucha is acidic enough to pull lead out of a bad glaze, and public-health reports describe exactly that happening to home brewers. Keep the culture away from long contact with reactive metals and from plastic that is not food grade.
The kombucha ratio
Kombucha is forgiving, but the ratio of tea, sugar and starter sets up everything that follows. A good baseline per liter of water is 5 g of tea (about two tea bags), 60 to 70 g of sugar, and 100 to 200 ml of starter liquid from a previous batch. Colorado State University’s extension guide uses a somewhat different recipe for a gallon: 4 to 8 tea bags, one cup of sugar and one to two cups of starter.
| Batch size | Tea | Sugar | Starter liquid |
|---|---|---|---|
| 1 liter | 5 g (2 bags) | 60–70 g | 100–200 ml |
| 2 liters | 10 g (4 bags) | 120–140 g | 200–400 ml |
| 4 liters (about 1 gallon) | 20 g (8 bags) | 240–280 g | 400–800 ml |
Use a reliable starting recipe. The culture needs sugar, but the amount left in the finished drink varies. If you want to try less than 60 to 70 g per liter, change it gradually and check that the batch acidifies normally. A longer ferment can also reduce sweetness.
Starter liquid is the most underrated ingredient. It is finished, sour kombucha from the last batch, and it drops the acidity of the fresh sweet tea immediately, before mold or unwanted bacteria can settle in. More starter means a safer, faster start. The 10 to 20 percent range above is the sweet spot; if your starter is weak or new, use the higher end.
Step by step
1. Brew the tea
Boil the water, or at least part of it, and steep the tea for 10 to 15 minutes. Longer than a normal cup: you want a strong, slightly bitter brew, because it will be diluted by the starter and will mellow during fermentation. Remove the bags or strain the leaves.
2. Dissolve the sugar and cool it down
Stir the sugar into the hot tea until it disappears completely. Then let it cool to room temperature, below about 30 °C (86 °F). This is the one step you cannot rush: hot tea kills the culture. A shortcut is to brew the tea concentrated in a third of the water and top it up with cold water.
3. Add the starter liquid and the SCOBY
Pour the cooled sweet tea into the jar, add the starter liquid, and slide the SCOBY in with clean hands. It may float, sink, or sit sideways. All of that is fine: a new layer will form on the surface either way.
4. Cover and wait
Cover the jar with the cloth and secure it with the band. Put it somewhere between 20 and 26 °C (68 to 79 °F), out of direct sunlight, with some airflow, and away from the fruit bowl, houseplants, or the compost bin, which are sources of mold spores. Then leave it alone. Moving and peeking every hour changes nothing except your patience.
5. Taste from day 5
From about day 5 (day 3 in a warm kitchen), slip a clean spoon under the pellicle and taste. Sweet and flat? Give it more days. Pleasantly tart with some sweetness left? It is ready. Sharp like vinegar? It went a bit long; use it as starter or dilute it to taste. Taste cannot confirm safety: discard any batch with mold, an off smell, or no clear souring. Temperature moves this window a lot; how long to ferment kombucha walks through it.
6. Bottle it, and keep the next batch going
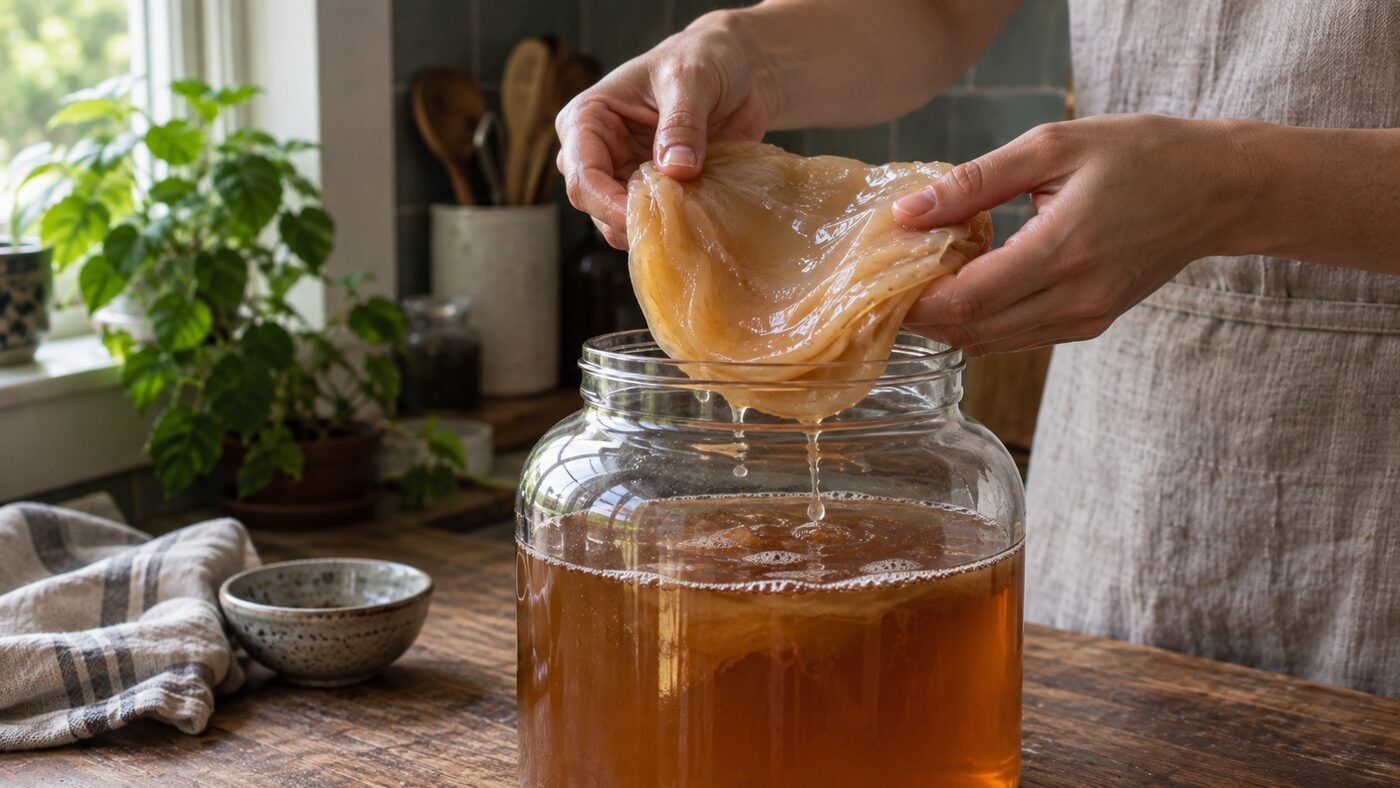
With clean hands, lift the SCOBY into a bowl and pour in 10 to 20 percent of the liquid to become the next batch’s starter. Pour the rest into bottles. You can drink it as it is, chilled, or add fruit and seal the bottles for a fizzy second fermentation. Then brew a fresh pot of sweet tea and start again.
What to expect, day by day
- Days 1 to 2: nothing visible. Maybe a few bubbles around the edge. The smell is still sweet tea.
- Days 3 to 5: a thin, translucent film forms on the surface and brown, stringy yeast hangs from the SCOBY. Both are good signs.
- Days 6 to 8: the film thickens into a new cream-coloured pellicle and the smell turns tangy, a little like cider vinegar.
- Days 5 to 14: tasting time. Sweetness fades day by day and tartness builds. Bottle when the balance suits you.
A new layer forms with every batch, so your culture will multiply; what a SCOBY is explains what to do with the extras. Odd looks are usually fine: bumps, holes, brown strings, a layer that sinks. Dry, fuzzy spots are not, and kombucha mold shows how to tell the two apart.
Keeping it safe
Home-brewed kombucha has a good safety record when the acidity does its job. The problems that show up in the medical literature come from contamination, unsuitable containers, or drinking large amounts of a very over-fermented brew, not from careful brewing. A few habits cover almost everything:
- Use clean equipment. Hot water and dish soap, rinsed well, is enough. Do not use antibacterial cleaners that leave residue.
- Always use enough starter liquid. Food-safety guidance for commercial brewers expects the pH to fall below 4.2 within a few days and a finished pH between 2.5 and 4.2; starter is what gets you there quickly at home.
- Keep the jar covered and the cover clean.
- If you see dry, fuzzy mold, throw the whole batch away, culture included. Never scrape and continue.
- Store finished kombucha in the fridge, and open bottles with care after a second fermentation.
Common first-batch mistakes
- Too little starter liquid. A splash is not enough. Use at least 10 percent of the batch volume.
- Adding the SCOBY to warm tea. Wait until the jar feels room temperature to the touch.
- Sealing the first fermentation. The culture needs air. Cloth only; lids come later, at bottling.
- Reducing sugar drastically without checking the result. Start with a reliable recipe, make small changes, and make sure the brew acidifies normally.
- Assuming a refrigerated culture is ruined. Cold slows it; keep an active SCOBY hotel at room temperature, and test a chilled culture in a small batch before scaling up.
- Giving up after a slow first batch. A culture that has been shipped or stored takes a batch or two to hit its stride.
Where to go from here
Once the first batch works, the rest is refinement. Learn to read the timing so every batch lands where you like it. Try a second fermentation for fizz and flavor. Look after the culture so it lasts for years. And know what mold looks like, so you never have to wonder.
Frequently asked questions
Can I use green tea instead of black?
Yes. Black, green, white and oolong all work, alone or blended. Green tea gives a lighter, quicker-fermenting brew; black gives a fuller flavour and a darker culture. Avoid teas with added oils or flavourings, and herbal teas without real tea leaves, which lack the nitrogen the culture needs.
Can I use honey, brown sugar, or a sweetener?
Plain white sugar gives the most predictable result. Brown sugar and raw cane sugar work but taste heavier. Honey belongs to a different drink, jun, which uses its own culture. Sugar-free sweeteners do not feed the yeast, so nothing ferments.
Do I have to buy a SCOBY?
No. You can grow one from a bottle of raw, unflavoured kombucha in two to four weeks. Buying or borrowing one just saves time. What a SCOBY is covers both routes.
Does the jar need to be in the dark?
Not strictly. Light does not harm the culture, but direct sun heats the jar and speeds things up unpredictably. A cupboard shelf or a kitchen corner out of the sun is ideal.
How much kombucha should I drink?
There is no official dose. Colorado State University’s guide suggests starting small, up to about 120 ml (4 ounces) a day with plenty of water, and increasing only if it agrees with you. It is a tart, mildly acidic drink, not a health treatment.
Can I brew continuously instead of in batches?
Yes. Continuous brewing uses a jar with a tap: you draw off some kombucha and top up with sweet tea, leaving a large portion behind as starter. It is convenient once you drink regularly, but a batch is easier to learn on. Continuous brew kombucha explains the method.
Sources
The guidance above draws on these references. Health and safety points are conservative on purpose: home brewing has real variability, and no article can check your batch for you.
These guides were drafted with AI assistance and reviewed by a hobby home kombucha brewer.
- Colorado State University Extension: Understanding and Making Kombucha
- BC Centre for Disease Control: Safety of Fermented Foods, section 3.11 Kombucha and Jun (2024)
- Nummer, B. A. (2013). Kombucha brewing under the FDA model Food Code: risk analysis and processing guidance. Journal of Environmental Health
- Jayabalan, R. et al. (2014). A review on kombucha tea: microbiology, composition, fermentation, beneficial effects, toxicity, and tea fungus. Comprehensive Reviews in Food Science and Food Safety
- American Homebrewers Association: Making Kombucha at Home